Intro to Three.js, Part 1 - Building the Earth
23 Jan 2016In this post: 3D graphics, three.js, texture mapping
3D graphics are awesome, but they are generally quite difficult. For a long time, the only option was to build graphics using WebGL, a low level language that is verbose and pretty challenging. Three.js is a wrapper for WebGL. It reduces the amount of boiler plate code you have to write by huge amount and uses straightforward constructor functions for creating 3D scenes. There can still be a certain amount of headache in getting started, but I'm hoping to ease that a bit with this set of posts.
The goal for today is going to be building a model of the Earth in three.js. We'll cover a lot of important methods and concepts in this post, and by the end you should have more than enough to start experimenting.
Take a look at the github repo for the full source code
Basics
A three.js scene consists of three main components: the scene, the camera, and the renderer. Lets go ahead and make those.
var scene = new THREE.Scene();

//Create a new perspective camera
var camera = new THREE.PerspectiveCamera(45, window.innerWidth/window.innerHeight/window.innerWidth, 1, 1000);
camera.position.set(0,0,10);

//Create the WebGL renderer and set its size to the full dimensions of the screen.
var renderer = new THREE.WebGLRenderer({antialias: true});
renderer.setSize(window.innerWidth, window.innerHeight);

//Add the renderer canvas to the DOM.
document.body.appendChild(renderer.domElement);
First we initialize a new scene. We will add different objects to the scene as we progress. Next, we create a new perspective camera. There are a few different types of cameras. This one in particular takes four arguments: the vertical field of view, the aspect ratio, the near boundary of the camera's view, and the far boundary of its view. Those last two just define how close and how far the camera can see. The camera determines what part of the scene we actually see and will be our eye in the sky in three.js. We can move it and point it in any way we like, giving us a pretty boundless set of options. When we initialize it, the camera's position will be set to the origin (0,0,0). We'll want to move it a bit, so we use the set method of the camera's position property to move the camera to 10px on the z-axis, or (0,0,10). Just for clarity, any time we refer to a position, the notation it will follow is (x,y,z).
Next we create the renderer and set its width and height to the maximum width and height of the browser window. Note the realtionship between the renderer and the camera aspect ratio, generally we want the aspect ratio to be equal to the renderer width/renderer height, otherwise our scene and its objects will probably end up distorted. We also have the "antialias" property set to true. Don't worry about this for now, just know that is has the effect of smoothing out pixellated shapes and lines, and we'll almost always want to use it. Lastly, we append the actual DOM element of the renderer to the body of the page.
One thing to touch on quickly before we go on is the coordinate system in three.js. It uses a right-hand coordinate system:
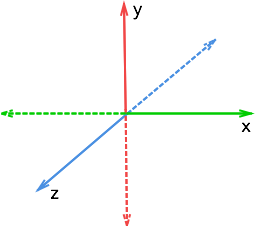
Keep this in mind throughout, as it will determine the placement and motion of all of the objects in our scene, as well as our camera.
Lights
Now before we add any objects to our scene, we will need to add some lights, otherwise our scene will be totally dark and any objects in it invisible. To do this we will use two basic kinds of lights.
//Create a new ambient light
var light = new THREE.AmbientLight( 0x888888 )
scene.add( light )

//Create a new directional light
var light = new THREE.DirectionalLight( 0xfdfcf0, 1 )
light.position.set(20,10,20)
scene.add( light )
The first light we add is an ambient light, meaning this light will radiate from all directions, which is useful if we just want our entire scene to be lit up without doing anything complex. We also pass one argument to our light, a hexidecimal color code, prefixed in three.js by "0x". Here, we have given our ambient light a grey tint. After we create the light, we must then add it to the scene.
The second light we create is a directional light. This is a light that will emanate from a certain position, which we set to be (20, 10, 20), the right-upper corner on the near side. The two arguments we pass here are the hex color, and the intensity. We give it a white-yellow tint, and the maximum intensity of 1. We will use this light to simulate the light coming from the sun. If we wanted to be realistic, we would only use this light, but we'll keep the ambient light because it will make our full scene easier to see.
Objects
Now that we have our scene, lets add some objects to it. The three main components of an object are the Geometry, the Material, and the Mesh. Three.js has a wide selection of predefined objects, including things like boxes, toruses, spheres, and much more complex shapes. Similarly, Three.js has a wide selection of materials, each of which accepts a number of parameters. The basic idea here is that we first have to create a geometry and a material, then we use those to build a new mesh, which will be the complete object. We want to build the earth, so we'll use the sphere geometry.
//Create geometry and material
var earthGeometry = new THREE.SphereGeometry( 5, 50, 50 );
var earthMaterial = new THREE.MeshPhongMaterial({
  color: 0xaaaaaa
});

//Build earth mesh using our geometry and material
var earth = new THREE.Mesh(earthGeometry, earthMaterial);

//add the earth mesh to the scene
scene.add(earth);
Our sphere geometry take three arguments: The radius of the sphere, the number of radial segments, and the number of height segments. The number of radial and height segments will determine the smoothness of the spehere; the greater number of segments, the smoother the surface will be (up to 100 or so). If we had kept the camera positioned at the origin, we would see nothing, as we would be inside the spehere. But placing the camera at z=10 is far enough that we can see the full sphere.
Next, we create our material using the MeshPhongMaterial. I like this material because it interacts with directional lights, and it allows us to add textures, which we'll get to in a moment. This material takes a number of optional properties, but to start, we will just pass it the color (grey). After building the mesh, we add it to the scene.
Were almost there, but we need one more element before our scene is rendered to the screen.
The Render Loop
The render loop is where we actually render our scene to the DOM. A simple render method might look as follows.
var render = function (actions) {
  renderer.render(scene, camera);
  requestAnimationFrame( render );
};
render();
Here we have a method which invokes the render method of the renderer we created earlier, passing in our scene and our camera as arguments. The next line will invoke our render method again after a certain interval. Using requestAnimationFrame, the default will be 60 renders per second. After we define this method, we must invoke it once to kick off the rendering.
Inside this method would be an excellent place to make modifications to our scene, including manipulation of the camera and different scene objects. We'll cover that in the next post. For now, if you run all the above code, you will finally see our sphere. (see the github repo for index.html setup).
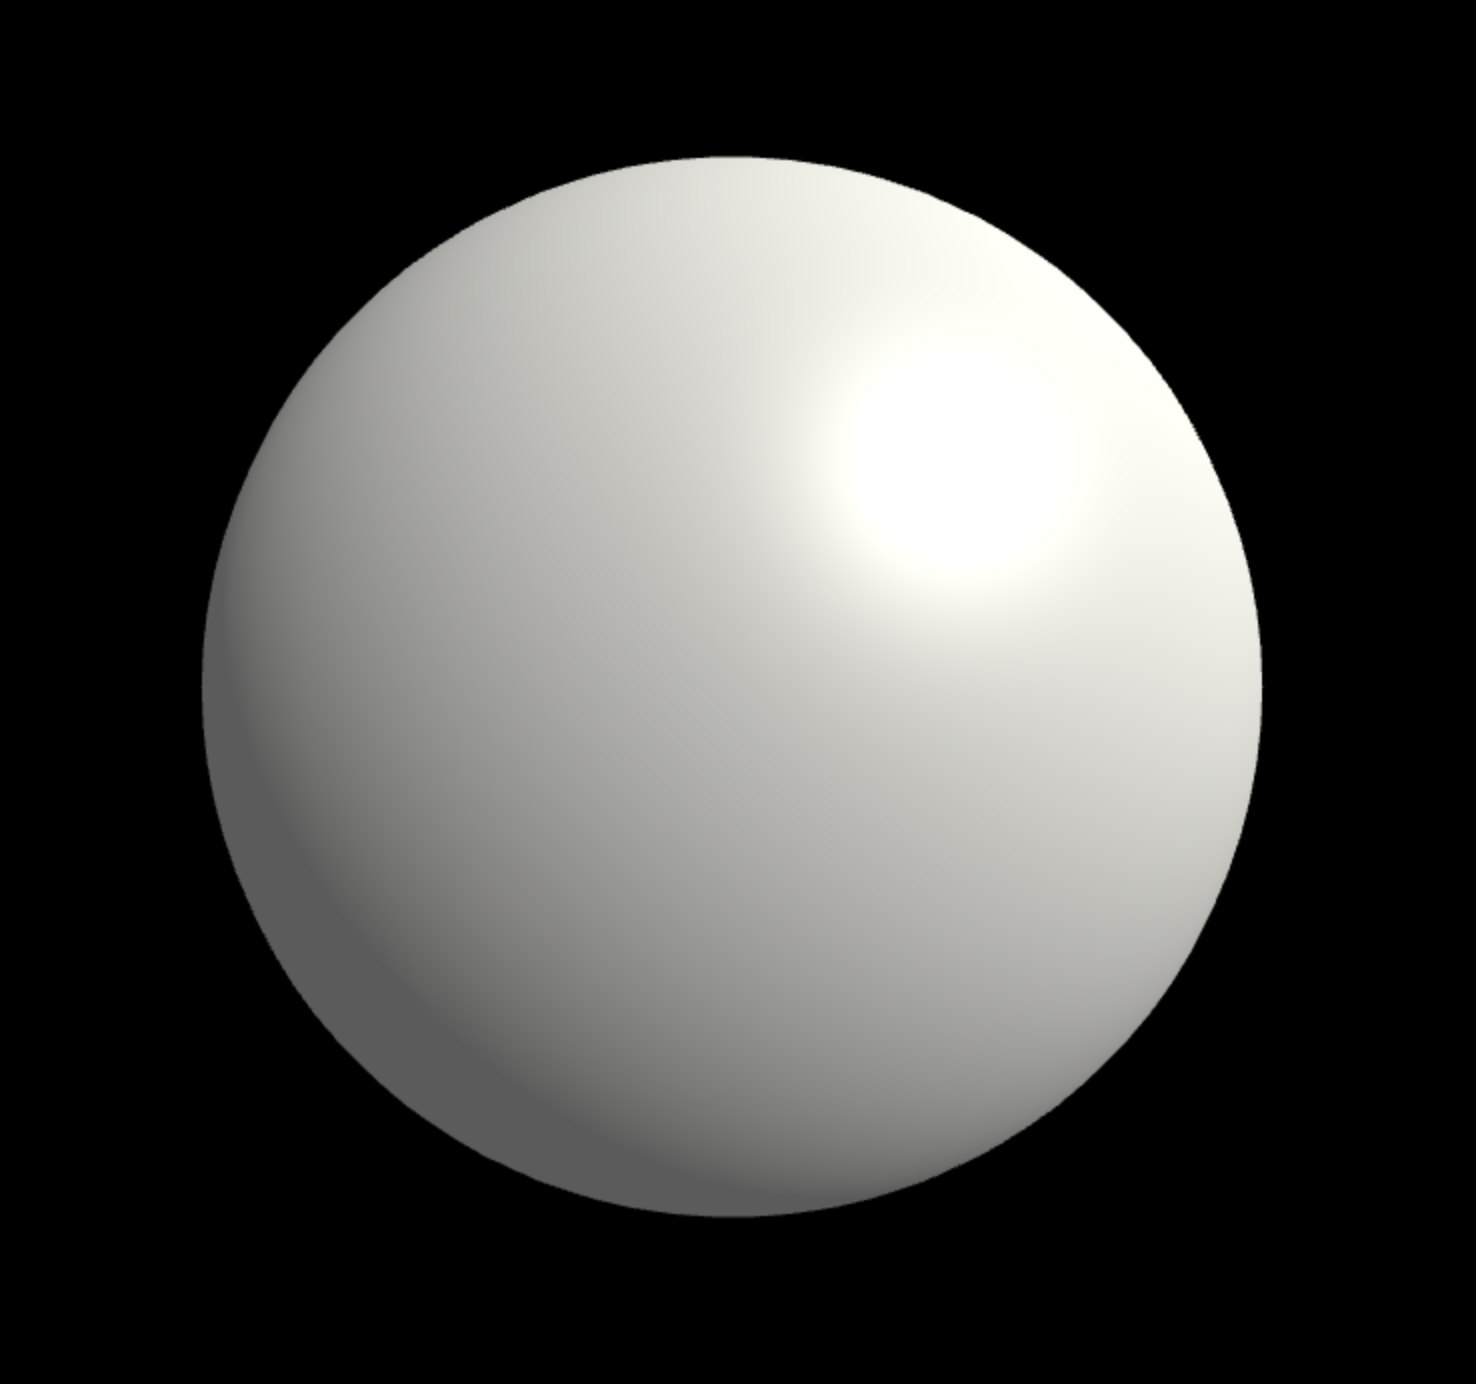
You can see how the directional light shines on the top-right side of the sphere. Lets go ahead and add a texture to our material. We will only need to modify the MeshPhongMaterial properties.
var earthMaterial = new THREE.MeshPhongMaterial({
map: new THREE.ImageUtils.loadTexture("../images/earth_texture.jpg"),
color: 0xaaaaaa,
specular: 0x333333,
shininess: 25
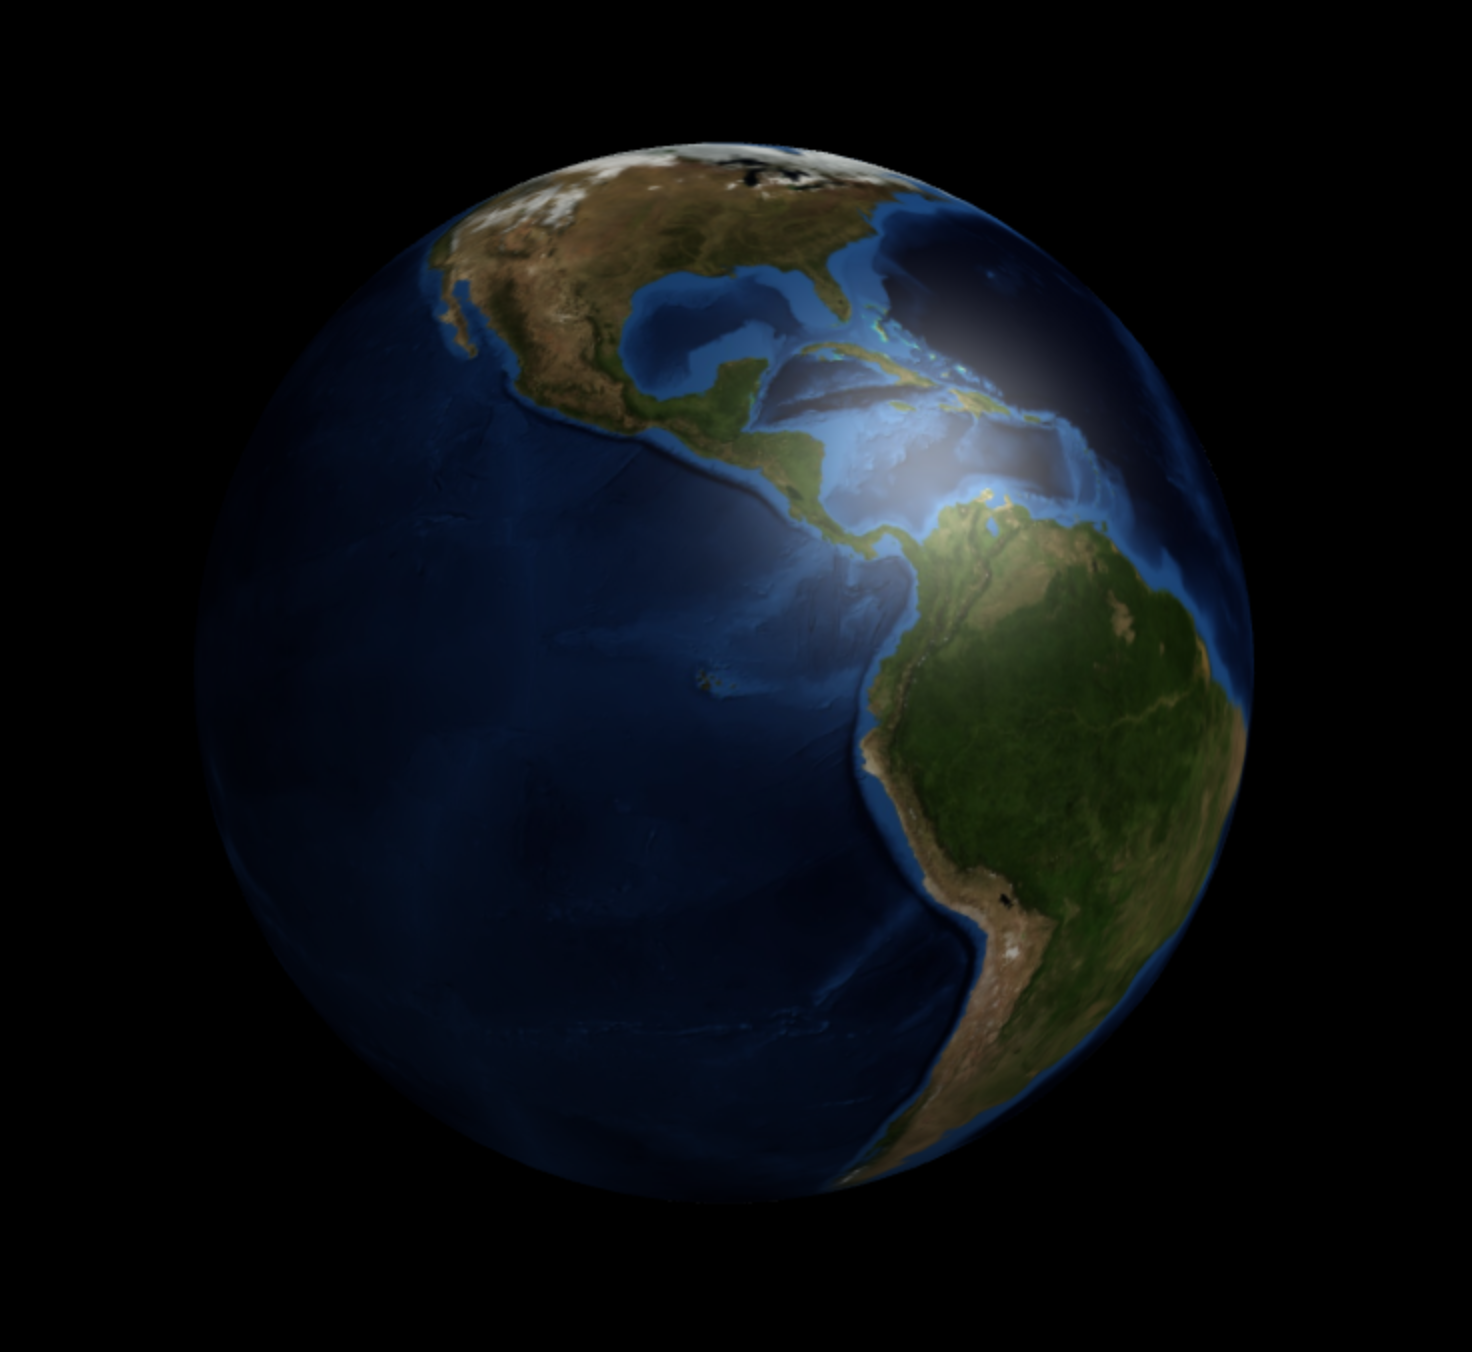
});Here we add three new properties. First, we add a texture map with the map property. For the value, we use the load texture method of three.js image utilities, passing in the source of our image. This will take a rectangular image of the earth, and wrap it around our sphere geometry. Its a pretty amazing property. Next we set the specular and shininess properties. The specular property sets the color of light reflecting off our sphere, while the shininess property determines the intensity of that light. In this case we use this in combination with the directional light to simulate the appearance of the sun relecting off of the surface of the ocean.
Note: Once you start using textures, you will need to host your files on a server. Otherwise you will get cross origin errors when trying to load the images, even if they are stored on your machine. Fortunately this is easily fixable. I recommend using python simple server or npm live-server. For python, its as simple as navigating to the root of your directory in the terminal and running "python -m SimpleHTTPServer". This will host all of the files in the current directory on port 8000, so in the your browser just type "localhost:8000" in the address bar, and you'll be able to view all of your files from there. If, by chance, you have python 3.0, you'll probably need to run "python2.7 -m SimpleHTTPServer".
We've covered a lot in this post, including creating scenes, adding objects to scenes, rendering a scene, and adding textures to our materials. With this in mind, you should be able to get up and running with some of your own experiments in three.js. In the next post, we'll cover making our scenes interactive and adding motion to our camera and objects with a simulation of the earth-moon system.